#StandWithUkraine - Stop the Russian invasion
Join us and donate. Since 2022 we have contributed over $5,000 in book royalties to Save Life in Ukraine & Ukraine Humanitarian Appeal & The HALO Trust, and we will continue to give!
Share Your Google Sheets
If you’re working on a collaborative project with other people, Google Sheets offers several ways to share your data online, even with people who do not own a Google account. When you create a new Sheet, its default setting is private, meaning only you can view or edit its contents. In this section, you’ll learn how to expand those options using the Share button.
Log into your Google Drive account, click the New button, select Google Sheets, and create a blank spreadsheet. You will need to name your file to proceed with next steps.
Click the Share button in the upper-right corner, and your options will appear as shown in Figure 2.7.
In the top half of the screen, you can share access with specific individuals by entering their Google usernames into the Add people and groups field. For each person or group you add, on the next screen select the drop-down menu to assign them to be Viewer, Commenter, or Editor of the file. Decide if you wish to notify them with a link to the file and optional message.
In the lower half of the screen, you can share general access more broadly by changing the setting from Restricted to Anyone with the link, and granting permission for other people to View, Comment, or Edit the file. Also, you can click Copy link to paste the web address to your data in an email or public website.
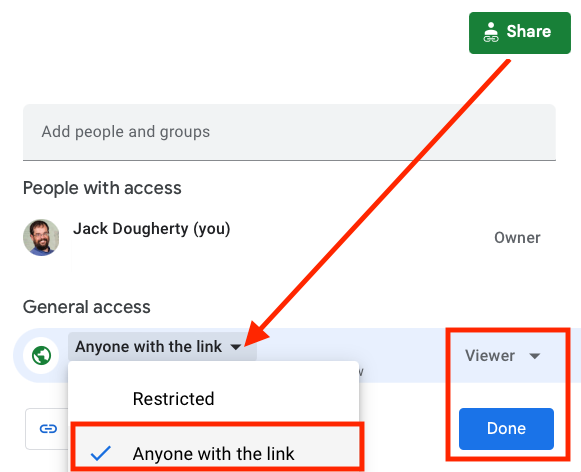
Figure 2.7: Click the Share button to grant access to specific individuals (top half), or offer general access so that Anyone with the link can View or Comment or Edit (bottom half).
Tip: If you don’t want to send people a really long and ugly Google Sheet web address such as:
https://docs.google.com/spreadsheets/d/1egX_akJccnCSzdk1aaDdtrEGe5HcaTrlOW-Yf6mJ3Uo
then use a free link-shortening service, such as TinyURL. For example, using our Bitly.com account (which previously was free), we pasted in a long URL and customized the latter half to something shorter, such as bit.ly/reader-responses, as shown in Figure 2.8. If someone else has already claimed your preferred custom name, you’ll need to think up a different one. Beware that shortened links may be case-sensitive, so we prefer to customize the latter half in all lowercase to match the front half.
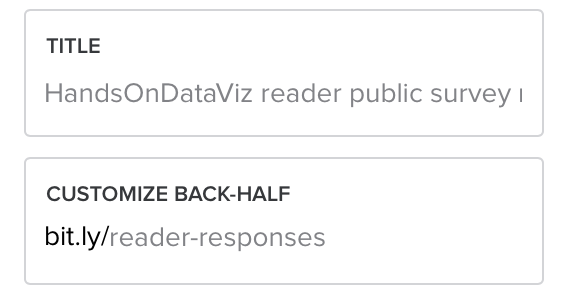
Figure 2.8: Use a link-shortening service and customize its back-end.
Now that you have different options for sharing a Google Sheet, let’s learn how to upload and convert data from different formats.